

After using Universal Analytics for so long, switching over to GA4 and finding where every part of your data is hiding can be tricky. In Universal Analytics, we could easily find segments in the Audience tab. In GA4, the Explore tab, and not as one would think the Report tab, is where to build and view customizable segments. Follow these five easy steps to create a segment in GA4.
Steps to creating custom segments in GA4:
Step 1
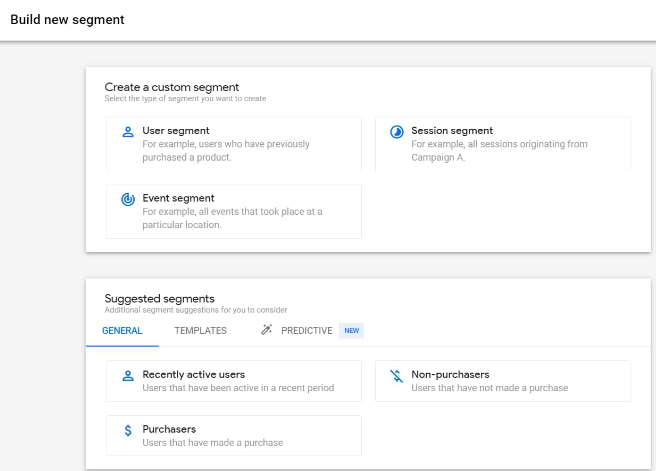
Go to the Explore Tab on the left-hand side of the homepage and select any of the premade reports or a Blank report.
Step 2
On the left-hand side of the report, you will see a column labeled Variables. There you can find all the metrics you can use in the report such as segments, dimensions, and more. Here you can create a segment from scratch or use one of the prebuilt segments GA4 provides. To create a custom segment, select the plus sign next to Segments.
Step 3
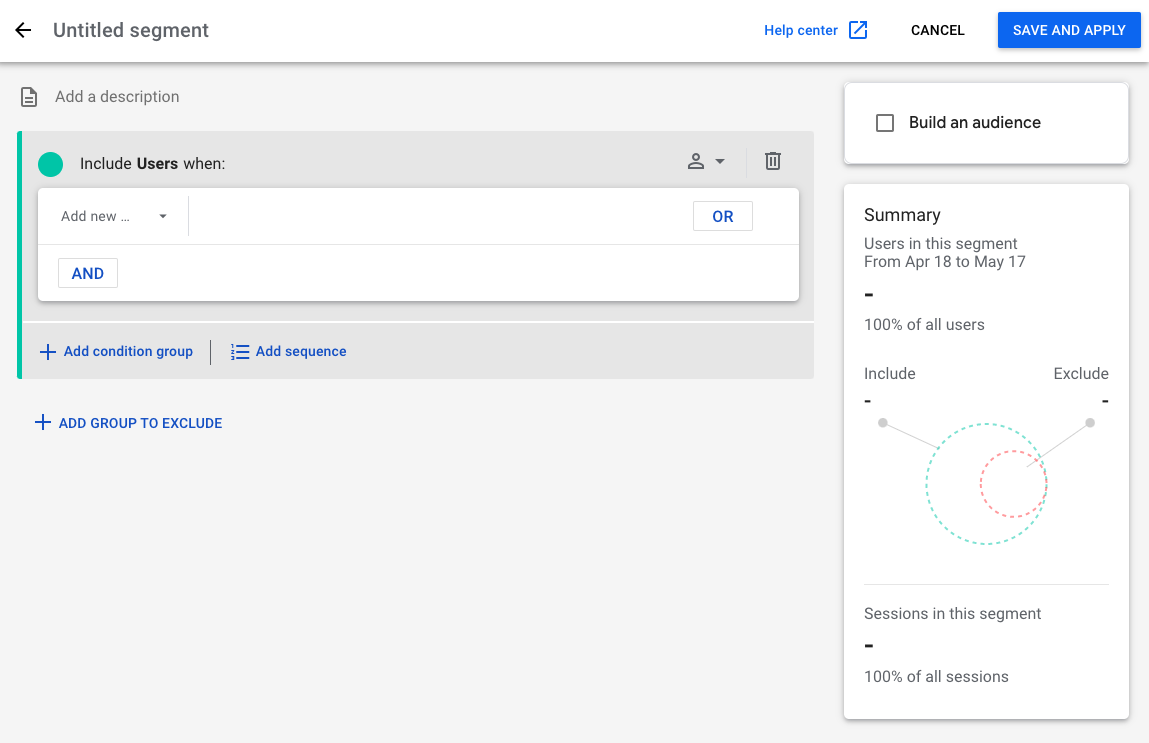
Next, select which custom segment to build. The segment builder then pops up on the right-hand side and is split into two parts, Segment Conditions on the left and Summary on the right.
Step 4
Click Add New below the green circle and start selecting how you would like to segment your audience. Here you can add multiple segments in one or create an “or” segment for your audience. The Summary section on the right will then change to reflect the size of your segment based on your conditions.
Step 5
Select Save and Apply on the top right corner — and there you have it! You have now created a segment report on GA4 that you can reference back at any time and change the dates to see how your segments are doing.
Segment uses
GA4 gives three options for segments — which should I pick? Luckily, GA4 has kept User and Session segments from Universal Analytics, while only adding Event segments to the mix. Here is a description of each segment’s primary uses.
User Segments
Use “User segments” when trying to view all events of users if they meet certain criteria. For example, adding a condition to view all users who submitted a form on your site. Users who meet this criterion will appear, along with all of their events taking place such as page views and clicks as they meet the criteria at least once.
Session Segments
Use session segments when you want to include all events and see which sessions meet certain criteria. For example, when setting criteria to see the event where a form was submitted, only the session that includes a submitted form will show, regardless of how many other sessions were completed and did not include a form submission.
Event Sessions
Use “Event sessions” when looking at specific events that match the criteria which will be included regardless of sessions and users. For example, when setting the criteria to show events where a form was submitted, only that event will show. Unlike Session segments, no other event will show (page views, clicks, add to cart, etc.) — only those that meet the criteria — in this case, form submitted.
The bottom line
With GA4, you can gain valuable insights and optimize marketing strategies with the help of segments. Take some time to explore the different segment types GA4 offers and the variables used to understand their impact on user data.
